


Article adapted from a publication by Heather McCargo of the Wild Seed Project.
Although most people prepare their seedlings in the spring, fall and winter are also excellent times to sow native plant seeds. In our latitudes, the annual cycle of seed maturation and germination differs from the garden and vegetable seeds that many of us are accustomed to.
Many native plant seeds do indeed require a period of cold, damp temperatures to break their dormancy and germinate. Essentially, this is a protective mechanism that plants have developed over the course of their evolution to ensure that their seeds do not germinate in the fall and to prevent the seedlings, still too young, from dying when winter arrives.
When we want to start seedlings in the spring, we must then play Mother Nature and offer these conditions to our seeds through a process called cold stratification.
Not all native plant seeds need this cold period to germinate; some can even be sown directly in the garden in spring. However, they can all be sown outdoors in fall or winter. Fall sowing offers several advantages, but the two main ones are that:
- You will have more space outside and will be able to sow more seeds, while still having indoor space for vegetable garden seedlings that cannot be done outside.
- Unlike indoor seedlings, outdoor seedlings do not need to be acclimatized, which will save you a lot of time.
Method for fall sowing
Below are six easy steps to carry out your outdoor sowing in the fall or winter.
Step 1 - gather your supplies
Gather the items you will need on a work table or in a clear area.
- Seeds
- Plastic pots for your seedlings (feel free to use what you already have at home, making sure to drill holes in the bottom to ensure good drainage)
- Plastic labels for each species you are going to sow
- Mechanical pencil (not a pen; even waterproof pens fade after several months)
- Organic compost-based potting soil
- Sand: coarse, all-purpose sand from a hardware store (no chemicals)
- Watering can with rain nozzle
- Rodent-proof mesh with ¼ to ½ inch openings, large enough to protect pots

Photo: Wild Seed Project
Step 2 - Prepare the containers
Fill the containers and tamp down the soil a little to create a flat surface ¼ or ½ inch from the rim.

Label the pot with the name and sowing date and press the label firmly along the rim of the pot.
Step 3 - Sow the seeds
The seeds can be sown very close together (1/8 to 1/4 inch apart). Distribute them evenly in the container on the surface of the potting soil.

Cover the seeds with the sand by sprinkling it on, a bit like you would add salt to a dish.

To determine the correct layer of sand to use, refer to the sowing depth indicated on your seed packet. As a general rule, cover the seeds with a layer one to one and a half times their diameter. Smaller seeds, which need light to germinate and should be sown on the surface, can still receive a thin layer of sand. This will allow sufficient light to penetrate and prevent the seeds from shifting or being washed away during watering or by fall and spring rains.
Water the pots gently, but thoroughly - do not flood them, as the seeds may float to the surface or fall out of the container.
Step 4 - Place the containers in a shaded area outside
Move the pots outside and cover them with rodent-proof netting. Make sure the pots are level. Under a bench or garden table, or on the north side of the house beyond the roof's drip edge, works well. A cold frame with a metal casing (not plastic or glass) is another good option.


Step 5 - Waiting for germination and seedling care
Don't worry! Rain, snow, sleet, a thaw in January, then an ice storm followed by more snow; the seeds will be fine.
 Photo: Wild Seed Project
Start checking containers for signs of germination towards the end of April (or when snow has melted). Each native species has its own germination schedule, ranging from the cool temperatures of early spring to the heat of summer. By the end of April, you'll need to begin watering every two days, depending on the weather, to prevent the soil from drying out. Be patient and observant. The seeds know what to do and will emerge when they sense the time is right!
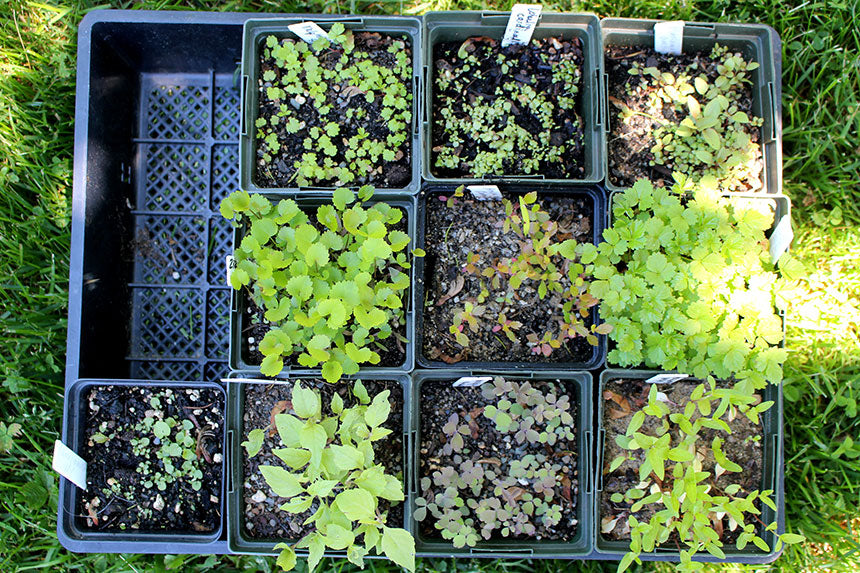
Photo: Wild Seed Project
In May or June, some species can be transplanted into larger pots, while others will be growing very slowly or may have just germinated. These can remain in their current pots. Sun-loving species should be moved to a partially sunny location to thrive.
Spring is also the ideal time to thin your seedlings. Depending on where you plan to plant them and how many plants you want to keep, you can remove the excess while retaining the most vigorous ones. The more seedlings there are in a single pot, the less time they can remain there without affecting their development. Ideally, root circling should be avoided, a phenomenon in which roots grow excessively along the inner wall of the container, which can compromise establishment in the garden. To check whether your pots are becoming root-bound, look underneath the container: if roots are emerging, this indicates that the root system is starting to run out of space.
Step 6 - Plant in your garden
Seedlings can grow all summer in your small nursery, then be planted in the garden in September. If you keep your plants in pots all summer, remember to add a dose of organic liquid fertilizer, such as Acadie or Carence products, every other week.
If you choose to plant them in the garden in spring or summer, simply be sure to check them regularly for watering and ensure that nearby plants don't crowd them. Most native plants are perennials, and some won't flower the first summer, but many will bloom the second.
Slow-growing woodland shrubs and wildflowers may take longer.
Thank you for sowing native seeds and joining the growing number of people who will allow native plants to reclaim their rightful place around our homes!